VLAN Tagging
VLAN tagging provides granular control over IP traffic for each project, allowing you to configure the networking interface on a per-project basis, assign a VLAN tag, and bridge the virtual interface to the appropriate VLAN on the physical network interface.
This feature is available in limited release and must be enabled by your account team. Operation requires either an isolated network or active collaboration from your Corporate IT.
Configure VLAN Tagging
-
As a domain administrator with VLAN tagging enabled, in the web interface navigate to Admin → then select the Networking tab.
-
Click Add network and configure the following values:
- VLAN name: Assign a name to the VLAN.
- VLAN ID: A unique identifier assigned to the VLAN, which must match the VLAN ID configured on the connected network infrastructure (e.g., router) to ensure proper network segmentation and traffic routing.
- Physical interface: The physical network interface where the VLAN ID is mapped.
- DHCP mode: Determines whether the appliance handles DHCP:
- External: The connected network infrastructure handles DHCP.
- Internal: The appliance acts as a DHCP server, managing IP addressing for the subnet, requiring:
- Gateway: The default gateway for devices within the VLAN.
- Network: The IP subnet range assigned to the VLAN.
- DNS server(s): The DNS resolvers used by devices in this VLAN.
Example configurations parameter we'll use:
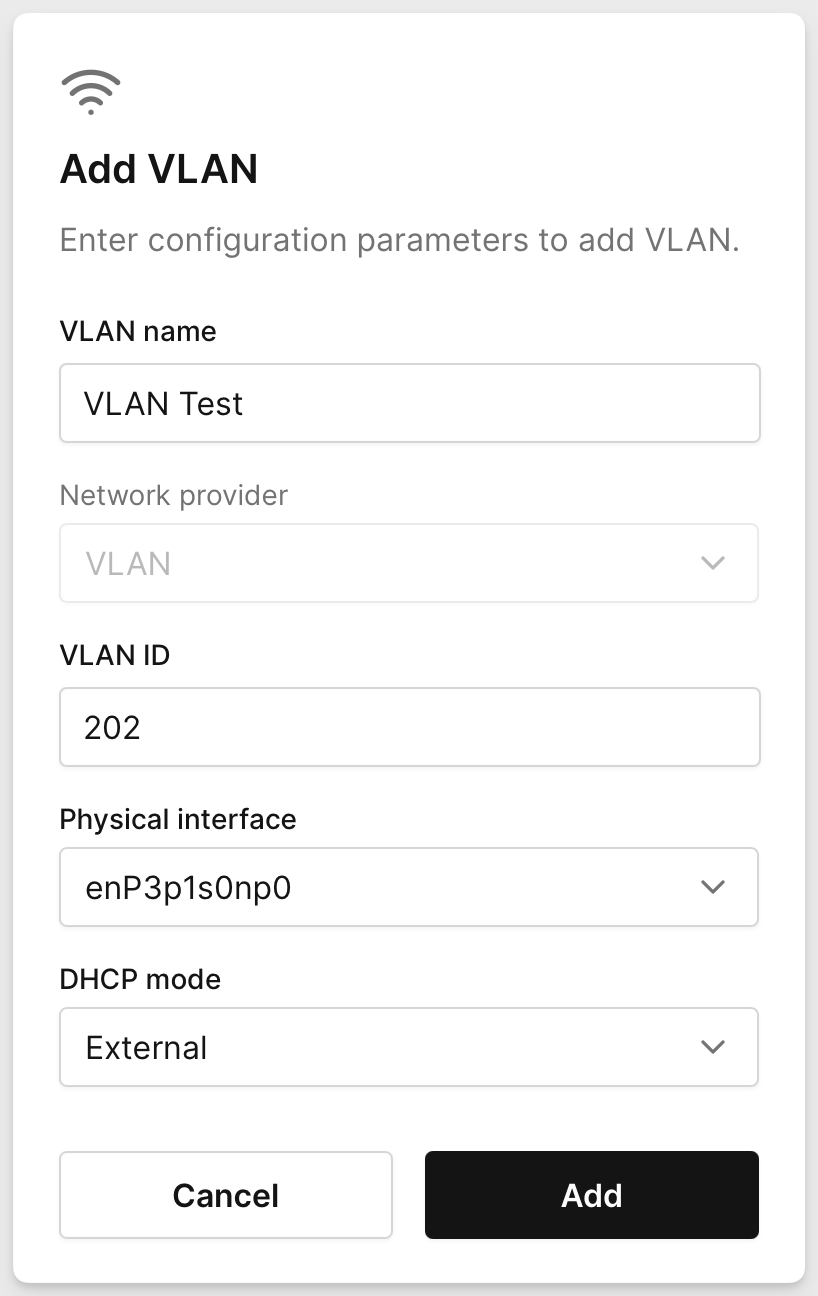
-
After supplying the configuration parameters, click Add.

-
Configure the project settings to use the VLAN network. Navigate to Admin → Projects → click the project you want to use the VLAN and assign the VLAN in the Networking drop down selection.
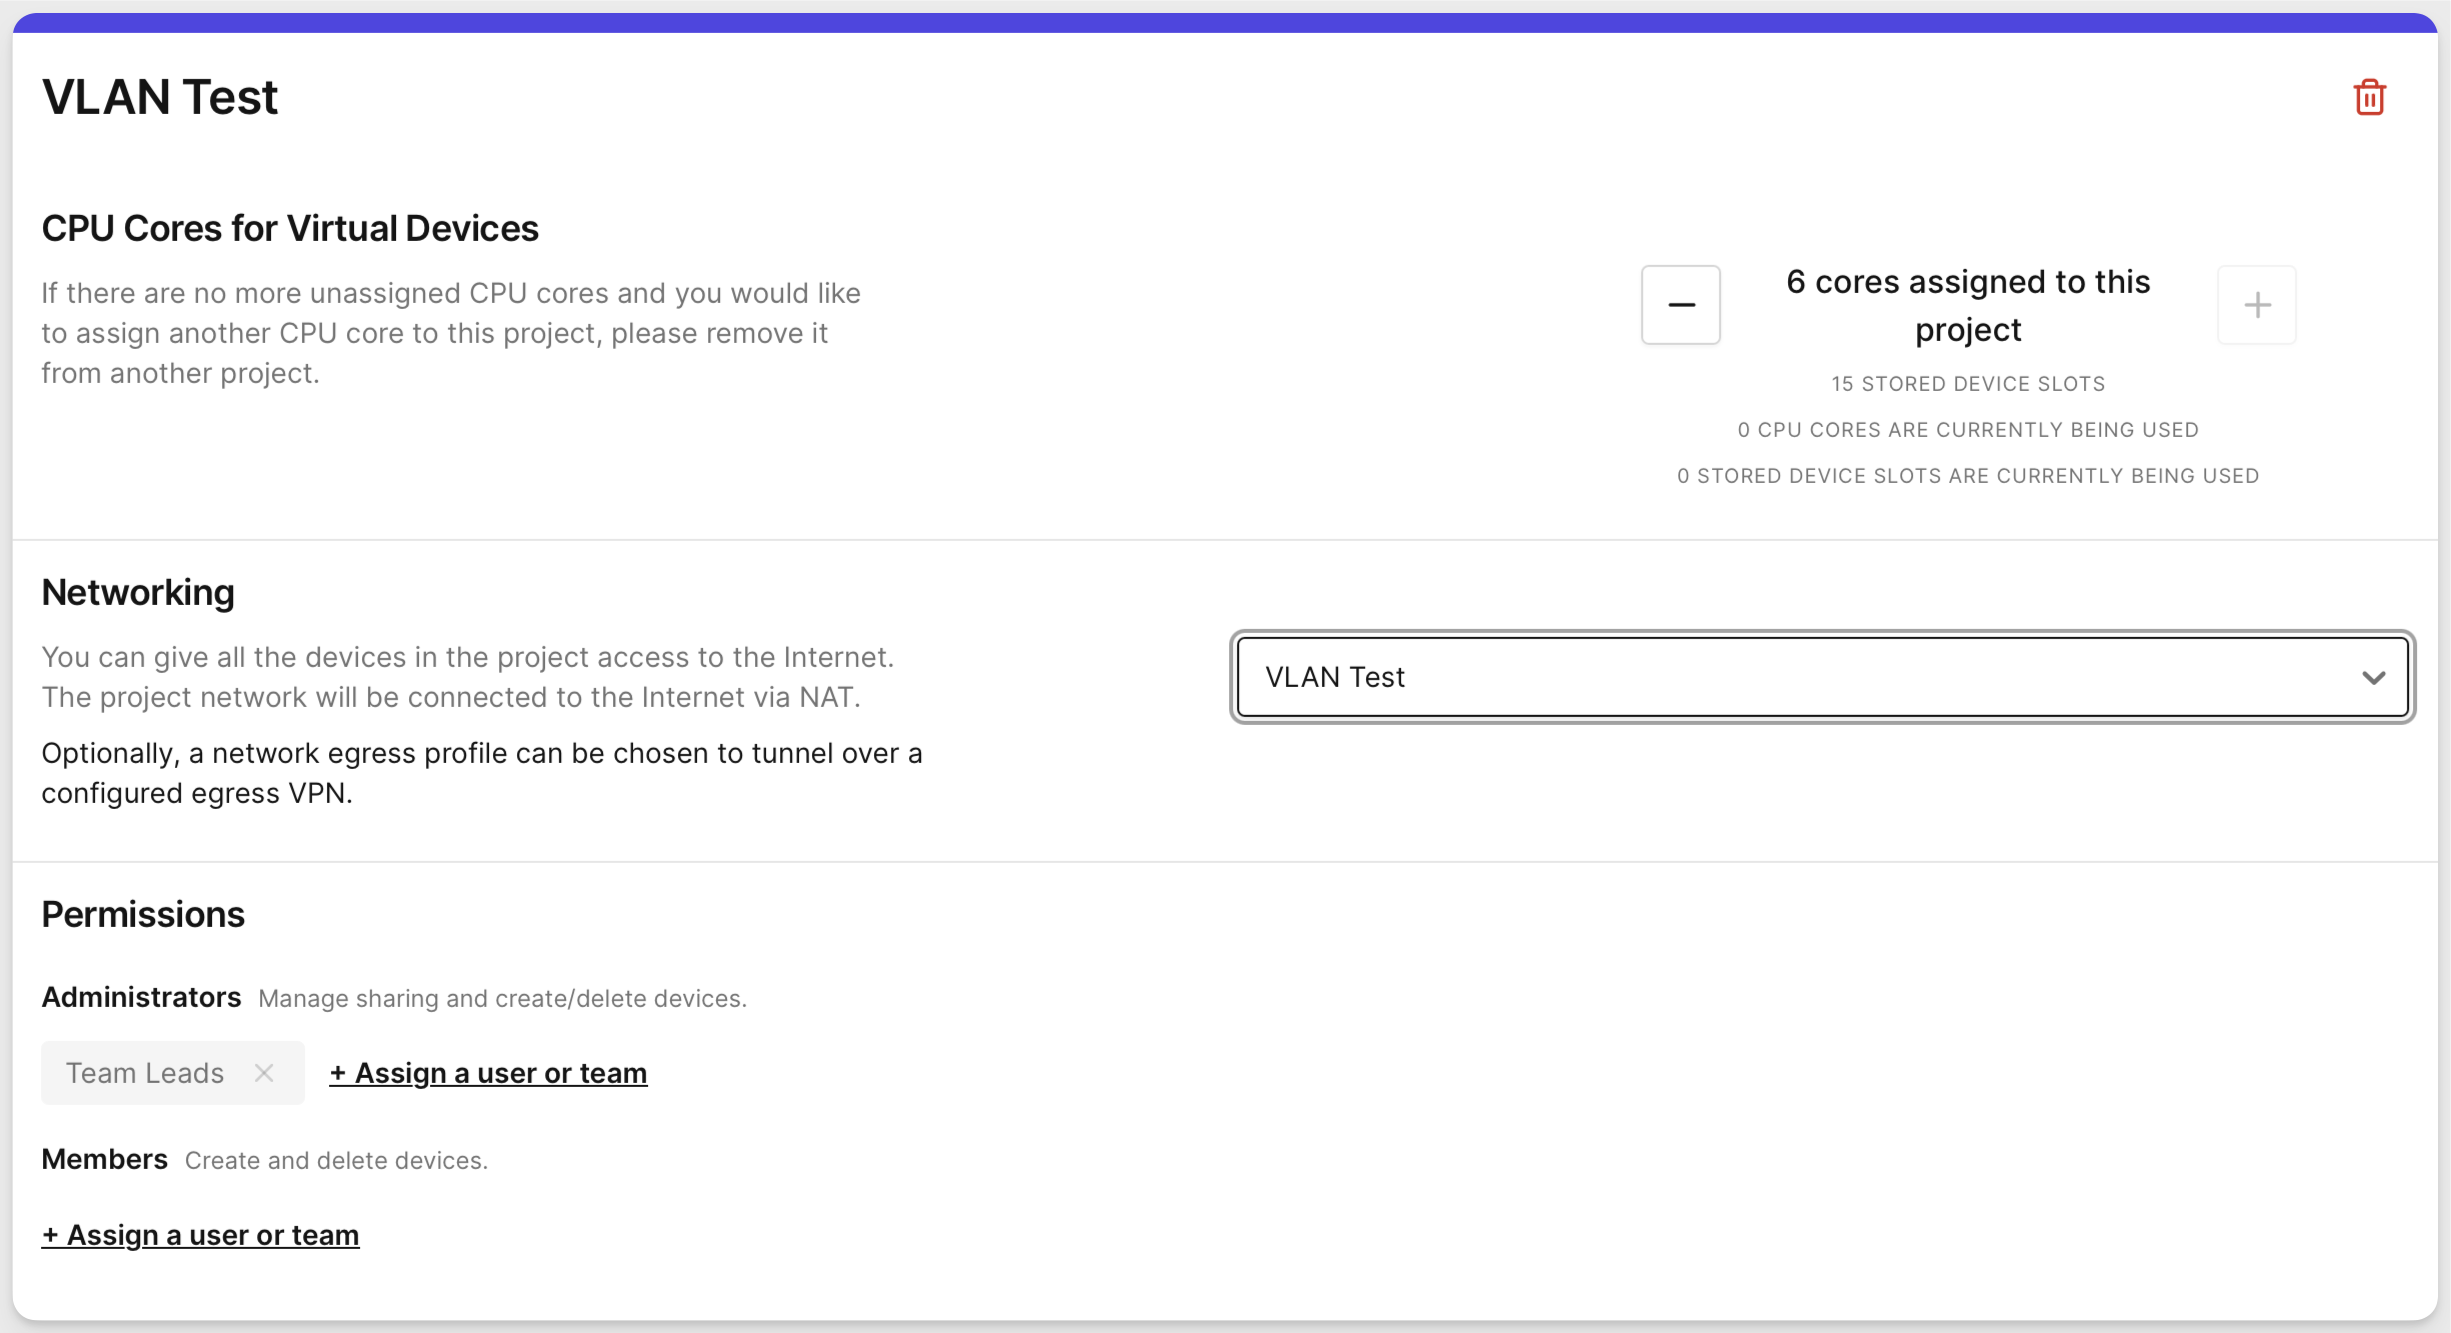
All instances in the specified project will then use the VLAN for networking.
noteTo assign the VLAN to a project with active devices, you must first stop all instances. Once the VLAN is assigned, you can start the instances, and they will use the VLAN networking.
-
We'll create a new device in the project where we've configured the VLAN.
As the device creates, the VLAN network changes from a disconnected state to a connected state. Click on the VLAN network to view the logs.

-
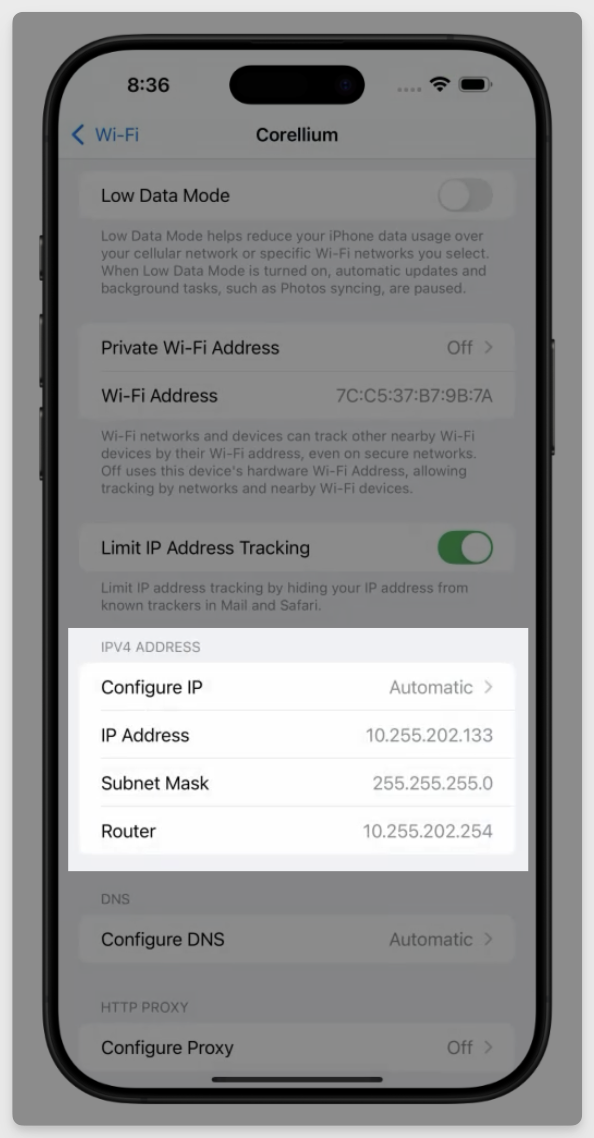
After the device has been created, opening the Wi-Fi settings in the iOS Settings app and selecting the connected network displays an IPv4 address within the VLAN range configured for the project.